
Practical technical support
How to upgrade the RAM in your computer
Check whether you’re running out of memory, identify compatible RAM and see how to fit desktop DIMMs or laptop SO-DIMMs.
Last reviewed:
More RAM gives your computer room to keep things open. If it copes perfectly well until you open a large project or an ambitious number of browser tabs, that extra room might make a difference. If it already has plenty spare when it slows down, buying another stick is unlikely to help.
Try closing something first
Bring on the slowdown with your usual mix of apps, then open Task Manager → Performance → Memory. Note the installed and available memory. A high used figure on its own tells you very little. Windows uses spare memory for caching. Look for very little available memory alongside the actual symptom, such as apps taking ages to respond as you switch between them. Close something substantial and try again. If it feels quicker straight away, keep investigating RAM.
Find the manual before you find a bargain
Search for the exact computer or motherboard model and its memory specification. Task Manager may show speed and slots used, which is handy for a first look. The manual is the place to confirm that those slots are accessible, how much memory the board and CPU can use, and what fits each slot. Some laptops have soldered memory, sometimes alongside a single replaceable module.
- Generation and shape. DDR4 and DDR5 aren’t interchangeable. Desktop DIMMs are longer than laptop SO-DIMMs. Some laptops use other formats, so check the manual before buying from the shape alone.
- Capacity and configuration. Confirm the total and per-slot limits, supported speeds and any restrictions on module type such as ECC or registered memory. Use the maker’s compatibility list where available.
- Filling the slots. A supported matched kit is simpler than guessing whether a new stick will play nicely with an old one. Follow the manual’s slot order. Two sticks often go in A2 and B2, but your board may differ. Start with the default memory settings before trying faster profiles.
On a desktop, look at the clips before pulling
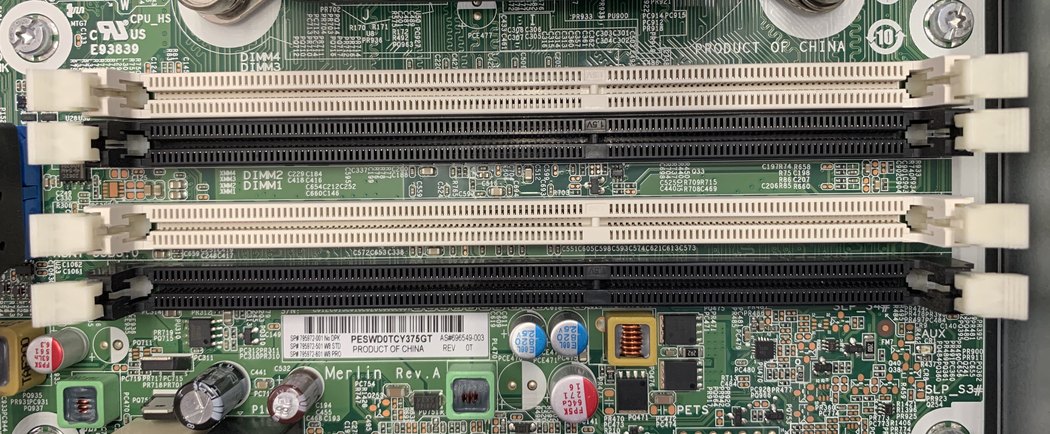
Shut down, unplug the computer and follow the manual’s static precautions. Hold the modules by the edges. A slot may have a moving clip at both ends or only at one. Open the movable clips, then lift the old module straight out. Find the offset notch on the new module and line it up before you press. Push evenly on both ends until the clips lock. If the notch is in the wrong place, turning it round or choosing the right module is the answer. More force isn’t.
Replacing a laptop’s RAM
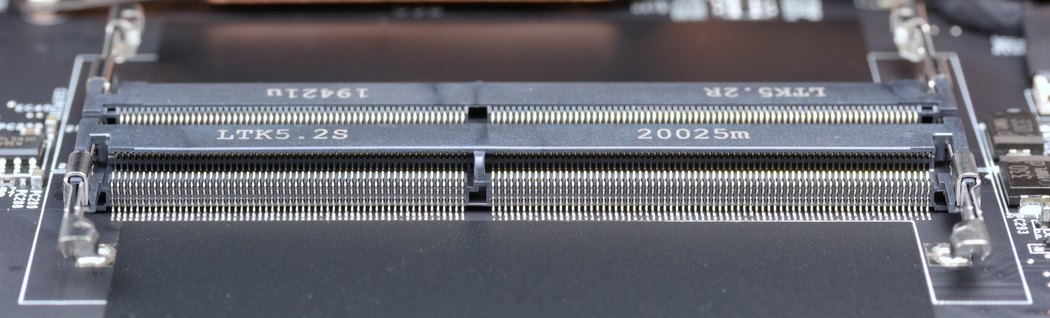
Laptop SO-DIMMs usually sit flat once installed. After following the service manual’s battery-disconnection procedure, ease the two side clips outward. The old module should spring up at an angle. Slide it out in that direction. Slide the new one into the socket at the angle shown in the manual, then press it down until both clips hold it.
Did Windows get all the memory you put in?
The first boot after a change can take longer while the firmware configures the new memory. Check the manual for what to expect. Once it starts, confirm the total in Task Manager or in the firmware. If some is missing or the PC refuses to boot, power down and recheck the notch, clips and slot order. When necessary, put the original configuration back so you have a known working starting point.
Try the same project or set of tabs you used before. Time a reload, a task switch or a render that was affected. If new crashes appear, return the memory to default settings and run Windows Memory Diagnostic or the manufacturer’s recommended test. Write down both the capacity and the result of the task. Seeing 32 GB in Windows feels nice, but being able to switch back to your work without waiting is the result you were after.