
SSD upgrade walkthrough
See a laptop drive swap on Switched On Network. Use the service manual for your own model.
Watch on YouTube (opens in a new tab)Practical technical support
Find the SSD that fits your computer, decide whether to clone Windows and check how much quicker your usual jobs become.
Last reviewed:
Prefer to watch?
See a laptop drive swap on Switched On Network. Use the service manual for your own model.
Watch on YouTube (opens in a new tab)If Windows still boots from a mechanical hard drive, swapping it for an SSD can make an old computer feel a good deal younger. Expect the difference when signing in, opening apps and searching through files. If your PC already has an SSD and your main complaint is how long a video takes to render, find the bottleneck before you order another drive.
Open Task Manager with Ctrl + Shift + Esc and go to Performance. Find the disk showing C: and note its model and whether Windows calls it an HDD or SSD. On a machine with two drives, the one storing family photos might be quite different from the one running Windows. If both are SSDs and you’re just running out of room, capacity may matter more than advertised speed.
Look up the exact laptop or desktop model, or the motherboard model for a custom PC. System Information in Windows can give you a starting point. Find the manufacturer’s service manual and storage specification. Even similar-looking laptops in the same range can have different bays and cables.
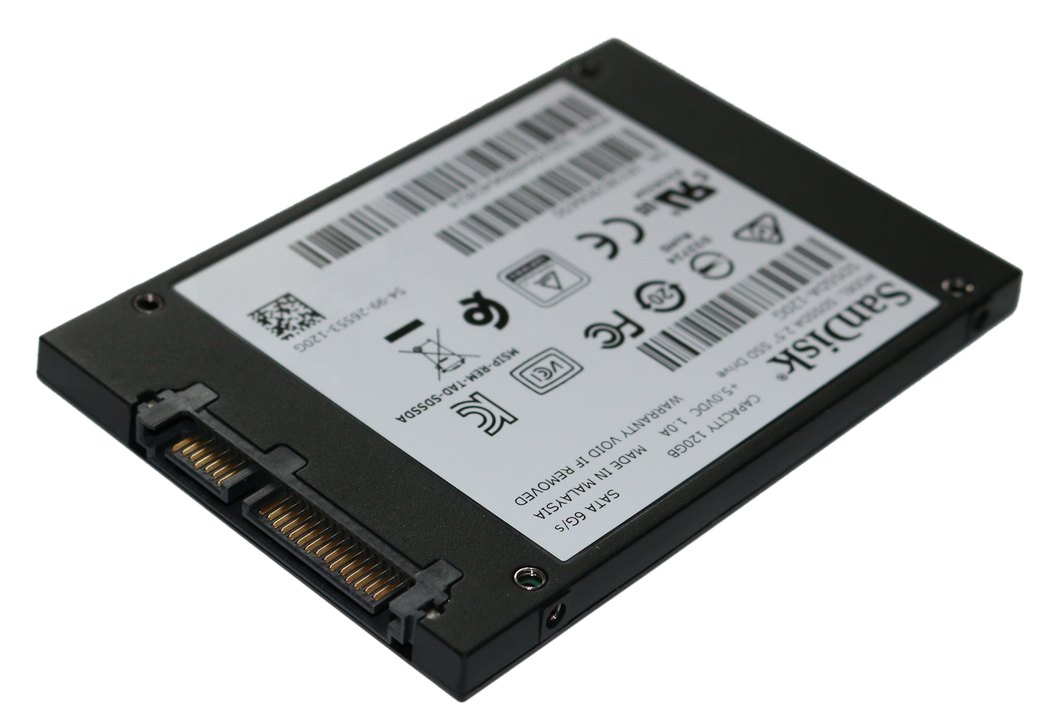
A 2.5-inch SATA SSD is the usual swap for a 2.5-inch SATA laptop hard drive. Confirm the bay thickness and whether you’ll need to transfer a caddy, ribbon cable or connector. A desktop may need a mounting tray and normally has separate SATA data and power connections.
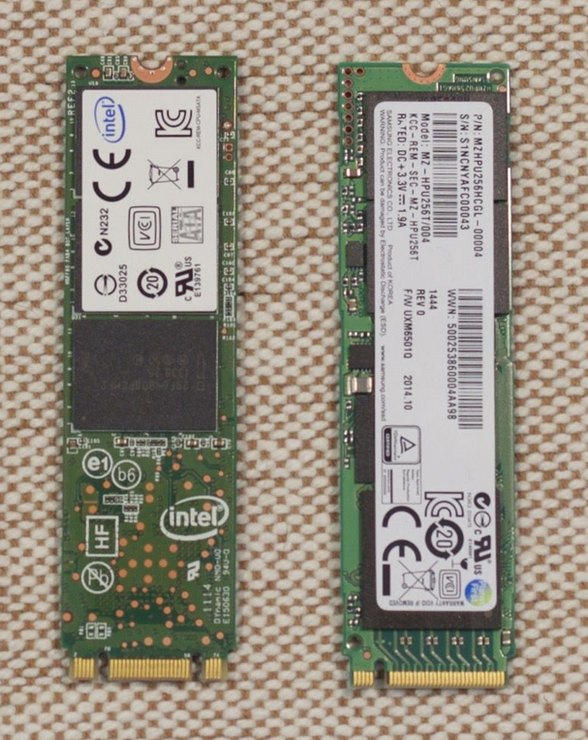
M.2 describes the shape. The drive might use SATA or PCIe/NVMe, and the slot may support one or both. Check the protocol, the supported length (2280 means 22 mm wide and 80 mm long), the mounting point and, for a Windows drive, whether the PC can boot from it. Some motherboards share connections between an M.2 slot and other ports. The manual usually has that detail in the storage section.
Cloning keeps the familiar installation, apps and settings. You’ll need a way to attach both drives, such as a USB enclosure that matches the new drive’s protocol. Read the cloning tool’s instructions for encrypted drives, boot partitions and moving to a smaller disk. Check the source and destination by model and capacity before starting. The destination gets overwritten.
A clean installation takes longer to put back together, but it gives you a fresh copy of Windows. Create the installer USB while the old drive still works, and make a list of apps and settings you need afterwards. In either case, back up files separately and open a few from the backup to check it. If BitLocker or Device Encryption is enabled, make sure you can get to the recovery key from another device. If the drive is failing or your files are irreplaceable, deal with recovery first.
If the SSD doesn’t show up in the firmware’s storage list, shut down and recheck seating, cables and compatibility. If it shows up but Windows won’t boot, check the boot order and the cloning tool’s instructions. Keep the old disk intact until the new one has booted reliably and you’ve checked your files.
Time Windows sign-in to a usable desktop and the first launch of a big local app. Use the same power mode and compare the middle result of three runs. A sequential transfer benchmark tells you something about large files. Opening the same photo library tells you whether the upgrade helped the job you actually do.